Starting handmade jewelry at home is easiest when you pick one simple style, gather a few basic tools, and practice clean finishing. Beginners usually do best with stretch-bead bracelets, beaded earrings, or a basic pendant necklace because they require fewer techniques and give quick results.
Pick one item you can finish in under an hour. A stretch bracelet needs only beads and elastic. Basic earrings need headpins, ear wires, and a small set of pliers. A pendant necklace can be as simple as a charm on a chain.
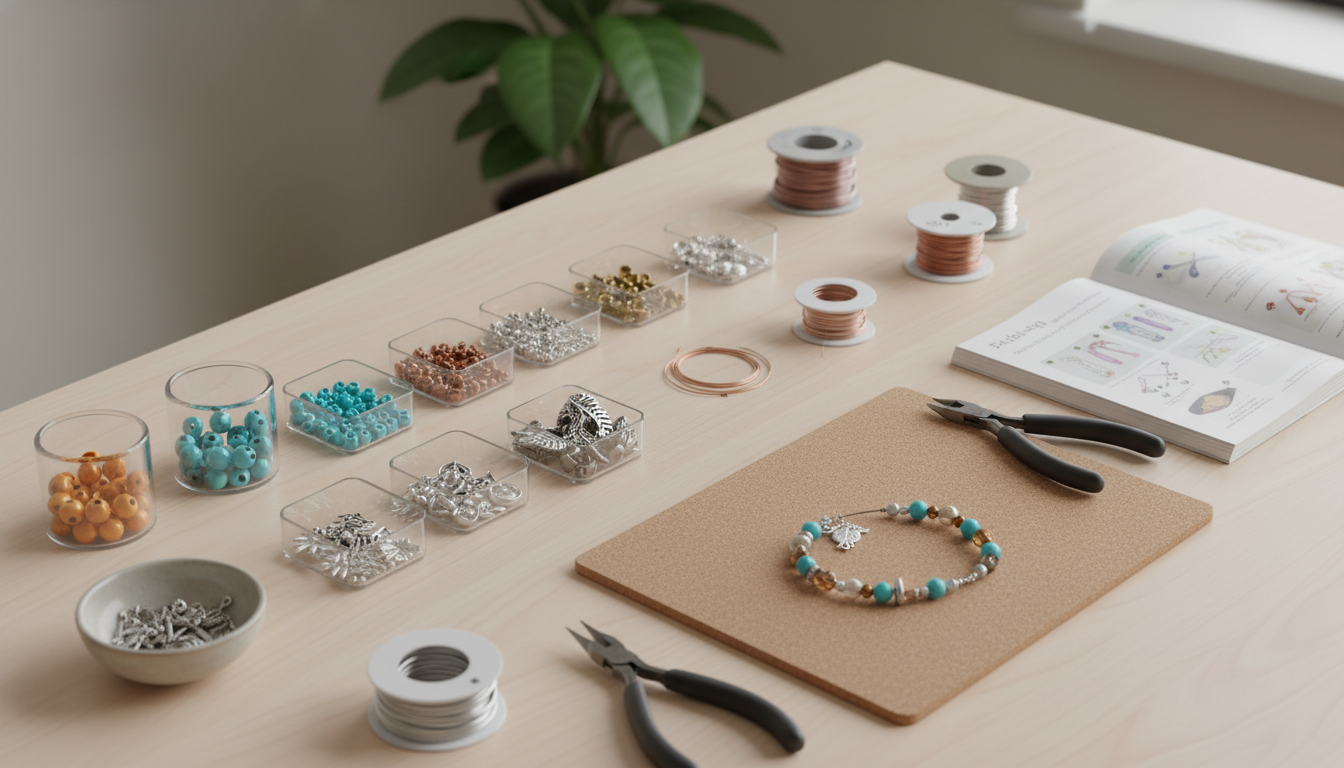
You can make a lot with three tools: chain-nose pliers (grip), round-nose pliers (loops), and flush cutters (clean cuts). Add jump rings, a clasp set (lobster clasp + split rings), and either beading wire with crimp beads or stretch cord, depending on your project.
Lay beads or components on a tray and check spacing, symmetry, and length. For necklaces and bracelets, measure your wrist/neck and add a little extra for comfort and findings. This step prevents running short on beads and helps the piece look intentional rather than random.
For stretch bracelets, pre-stretch the cord, string beads, tie a surgeon’s knot, and add a small dot of jewelry glue. For beading wire, string your pattern, add a clasp with crimp beads, and crimp firmly so the wire can’t slip. For earrings, make simple loops with headpins, attach beads, then connect to ear wires with jump rings.
Close jump rings by twisting them sideways (never pulling them apart) so the seam meets tightly. Tug gently on knots and crimps, inspect for sharp ends, and smooth any rough edges with a file. Store finished pieces separately to reduce tangling and scratches.
For a more detailed walkthrough with project ideas and supplies, visit https://splendyn.com/how-to-make-handmade-jewellery-at-home-for-beginners/.
Start with chain-nose pliers, round-nose pliers, flush cutters, jump rings, clasps, and either stretch cord or beading wire with crimp beads. Add a small mix of beads or charms to practice a few different looks.


Leave a comment