Dubai Chocolate Bar Recipe Checklist: Easy Gourmet Treat With a Luxury Finish
A Dubai-style chocolate bar is all about clean snaps, glossy shine, and a rich filling that feels special without being complicated. A checklist approach keeps everything smooth: prep, melt, fill, set, and finish—so each bar looks gift-worthy and tastes like a boutique dessert.
What Makes a “Dubai-Style” Chocolate Bar Feel Luxurious
- High-gloss shell with a firm snap (well-tempered chocolate or correctly melted couverture).
- A rich, layered center: creamy nut paste, crunchy elements, and a hint of aromatic spice (optional).
- Clean geometry: sharp corners, even thickness, and neatly sealed backs.
- Finishing touches that read “gourmet”: flakes of salt, pistachio dust, gold-toned accents, or a drizzle pattern.
- Gift-ready presentation: uniform bars, minimal smudges, and tidy packaging.
Tools and Ingredients Checklist (Simple Setup)
- Chocolate molds (bar mold preferred); silicone works, polycarbonate gives a higher shine.
- Digital kitchen scale for consistent ratios and repeatable results.
- Heat-safe bowl and saucepan (or microwave) for controlled melting.
- Spatula, small offset spoon, and a piping bag (or zip bag) for clean filling.
- Optional but helpful: instant-read thermometer for precise temperatures.
- Base chocolate: dark, milk, or a blend; choose quality chocolate for better texture and shine.
- Filling options: pistachio or hazelnut paste, tahini, nut butter, sweetened condensed milk or white chocolate for structure, and crunchy add-ins (crushed biscuits, toasted nuts, wafer pieces).
- Finishes: flaky salt, chopped pistachios, cocoa powder, or edible gold-style dust (food grade).
Quick Ingredient Swap Guide
| If you have… |
Use this instead |
Result in the bar |
| Pistachio paste |
Hazelnut spread or almond butter |
Nutty center with a different aroma |
| Tahini |
Cashew butter |
Creamy, less bitter finish |
| Wafer/biscuit crumbs |
Toasted chopped nuts |
Crunch with more bite |
| Milk chocolate shell |
Dark chocolate shell |
Less sweet, sharper snap |
| White chocolate in filling |
Condensed milk + extra nut paste |
Softer, fudgier center |
Step-by-Step Checklist: Make the Chocolate Shell
- Prep molds: Ensure molds are completely dry and polished (a dry paper towel helps remove residue).
- Melt chocolate gently: Use short microwave bursts or a double boiler; avoid steam or water contact.
- Temper or stabilize if possible: Use a thermometer or seed method for better shine and snap. Callebaut’s tempering overview is a helpful reference: Chocolate tempering basics and guidance.
- Fill molds with chocolate: Tap to remove air bubbles and encourage an even surface.
- Create a hollow shell: If using a thick filling, invert molds briefly to drain excess, then scrape clean edges.
- Set the shell: Refrigerate briefly until just firm; avoid long chilling that can cause condensation later.
For the gloss and snap you’re aiming for, the goal is to let cocoa butter crystals set in a stable form—one reason quality chocolate behaves better. For a quick science read, see Britannica’s overview of cocoa butter.
Step-by-Step Checklist: Mix and Portion the Filling
- Choose a texture goal: Creamy center, crunchy center, or layered (creamy base + crunchy inclusions).
- Build structure: Combine nut paste with a firming ingredient (melted white chocolate or similar) so the bar slices cleanly.
- Add crunch last: Fold in crumbs/nuts at the end to keep them crisp.
- Taste and balance: A pinch of salt sharpens flavor; a tiny amount of cardamom/cinnamon can add a luxe note.
- Portion neatly: Pipe or spoon filling into shells, leaving headspace for the closing layer of chocolate.
Step-by-Step Checklist: Seal, Set, and Unmold
- Seal the backs: Spread a final layer of melted chocolate over the filling and scrape level.
- Tap and smooth: Remove trapped air pockets; ensure edges are fully covered so bars don’t split.
- Set properly: Chill just until firm, then let bars return closer to room temperature before unmolding to reduce condensation.
- Unmold carefully: Flex silicone gently or tap polycarbonate molds; avoid touching the shiny face too much.
- Inspect and trim: Scrape any overhang and clean edges for a professional look.
Finishing Touches That Make It Look Boutique
- Minimalist top: A few chopped pistachios and a pinch of flaky salt.
- Drizzle pattern: Thin lines of contrasting chocolate for a “gourmet” visual.
- Dusting: Cocoa, freeze-dried berry powder, or pistachio dust for color contrast.
- Gold-toned highlight: Apply sparingly to edges or a single corner for a luxury cue.
- Packaging: Parchment + clear sleeve or small box; include a label with flavor notes and storage.
Common Problems and Quick Fixes
Storage, Serving, and Gifting Notes
If your filling includes dairy-heavy components, follow conservative storage guidance and keep bars properly wrapped; the USDA’s cold storage chart is a useful baseline: USDA FSIS refrigerator guidance.
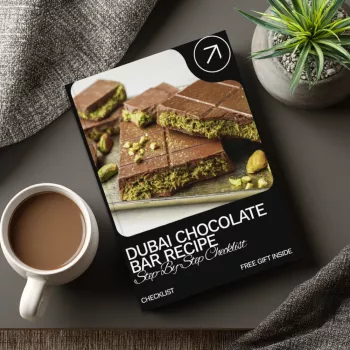
Printable Checklist Option
Helpful Digital Checklists (Instant Download)
FAQ
Do you need to temper the chocolate for a Dubai-style chocolate bar?
Tempering is strongly recommended for a glossy finish and a clean snap. If full tempering feels intimidating, the seed method (melting most of the chocolate, then stirring in finely chopped unmelted chocolate to cool it down) is a practical approach; untempered bars can look dull or develop bloom.
What filling works best for clean slices and a firm bite?
A nut-paste base reinforced with melted white chocolate (or another firming ingredient) sets up neatly and cuts cleanly. Add crunchy inclusions at the end, and keep liquid sweeteners modest so the center doesn’t stay soft.
How long do homemade filled chocolate bars last?
Bars with mostly nut paste and white chocolate tend to last longer than bars made with dairy-heavy or high-moisture fillings. For best quality, keep them tightly wrapped in a cool, dry place and aim to enjoy them within 1–2 weeks (shorter if the filling is more perishable).
Recommended for you




Leave a comment